It seems like everyone is talking about finding the keys to getting a six-pack of abs. Although there is no quick fix, regular exercise and a healthy diet will help you make progress more quickly. How to Make Six-Pack Abs at Home Fast: Create a varied ab training routine that includes crunches and planks. Keep in mind that your muscles need the right nutrition, and losing extra fat could be required to get the desired effects. Maintain a nutritious, well-balanced diet to help you on your fitness path. How to Make Six-Pack Abs at Home Fast and Effectively by Staying consistent with your workouts and diet.
1: Doing Crunch Variations
Do 12 basic crunches in 4 sets. With your knees flexed and your feet flat on the ground, begin by reclining on your back. Place your fingertips lightly behind your head. Exhale as you lift your upper back off the floor, holding the contraction for about 2 seconds. Exhale as you lower yourself back down. Ensure you’re not pulling your head with your hands. Keep your head, neck, and back in alignment, avoiding excessive arching of the lower back. Repeat these steps to complete each set of 12 crunches.
- Avoid pulling your head upward with your hands. Maintain alignment of your head, neck, and back, ensuring you don’t arch your lower back while lifting your torso. Repeat these steps to finish a set of 12 crunches.
- Lift your torso slightly to raise your shoulder blades off the ground. While a crunch effectively engages your abs, performing a full sit-up, where you raise yourself all the way to your knees, can potentially strain your lower back.
- To make the exercise more challenging, consider holding a weight over your torso while performing crunches. Begin with a lightweight, like a 5 to 10 lb (2.3 to 4.5 kg) plate, to minimize the risk of injury.
Engage your abs and exhale as you lift your knees over your hips to perform reverse crunches. Lie on your back with your knees bent and feet flat on the floor, while keeping your arms by your sides with palms facing down.
- Maintain a 90-degree angle at your knees, keeping them directly over your hips. Inhale, then exhale as you smoothly and controlledly lift your hips and lower back off the floor.
- Inhale once more as you lower your hips back to the floor while keeping your knees above your hips. Repeat these steps to finish a set of 12 reverse crunches. After the final repetition, lower your feet back to the floor.
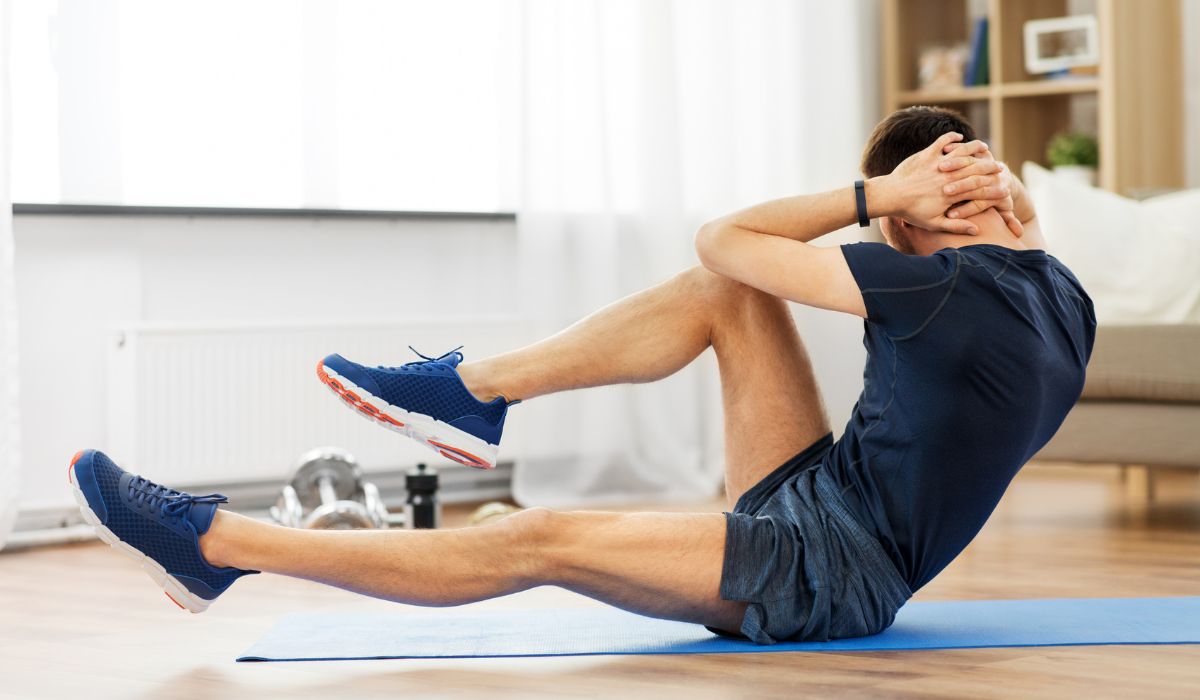
Incorporate bicycle crunches into your regimen. Begin by lying on your back with your knees bent and fingertips lightly touching the back of your head. Inhale deeply, then exhale as you lift your feet off the floor. Mimic a cycling motion by bringing your left knee toward your chest while simultaneously straightening your right leg.
- While pedaling, elevate your shoulder blades from the floor and twist your torso to guide your right elbow towards your flexed left knee.
- Next, extend your left leg while bringing your right knee towards your torso. At the same time, twist your torso to direct your left elbow toward your right knee.
- Keep pedaling and rotating your torso to complete 12 repetitions on each side.
Stretch your arms to perform overhead crunches. First, enter a prone position with your knees bent and your feet flat on the ground. above your head, ensuring your palms are facing up. Keep your arms in contact with the floor, and position your biceps (upper arms) close to your ears.
- While maintaining your arms extended above your head, elevate your torso as you would during a traditional crunch. Ensure that your head, neck, and spine remain aligned, and avoid arching your lower back.
- Like traditional crunches, you can increase resistance by holding a lightweight plate in your hands.
2 Mastering Plank Exercises
Perform the plank exercise with proper form to prevent injuries. To begin, place your forearms and hands flat on the floor while resting on your stomach with your face down. Inhale, then exhale as you raise your body off the floor, supporting yourself on your forearms and toes. Ensure your elbows are bent at 90-degree angles directly beneath your shoulders.
- Maintain a straight line from your skull to your spine by using your core muscles. Ensure your head remains facing downwards throughout the plank exercise, maintaining alignment with the floor.
- Attempt to sustain the plank position for 10 to 15 seconds initially, ensuring steady breathing throughout. If this duration feels manageable, gradually extend the time to 30 to 45 seconds to intensify the challenge.
Develop your abdominal and oblique muscles through side planks. Begin by positioning yourself on your right side, ensuring your right elbow is bent directly beneath your shoulder. Stack your left leg directly over your right leg. Inhale, then exhale as you activate your core muscles and extend your elbow to form a 90-degree angle.
- Maintain your elbow directly beneath your shoulder, ensuring that your head, neck, and spine form a straight line.
- Keep breathing steadily as you maintain the side plank position. Aim to hold it for 10 to 15 seconds initially, gradually increasing the duration to 30 to 45 seconds for a more intense workout. When finishing, lower your body slowly and with control.
- Return to the starting position by lowering yourself back down, then repeat the same steps on your left side.
- To make it more challenging, lift your upper leg off of your lower leg while maintaining the side plank position.
Also Read High-Protein Breakfast Foods, According To A Dietitian
Push yourself with extended planks. Begin in a prone position, similar to a standard plank. Extend your arms forward above your head, keeping your palms in contact with the floor. Engage your core muscles as you lift your body off the ground using your toes and fingertips.
- Maintain a neutral head position, ensuring that you face the floor throughout the plank. Your head, neck, and spine should align to form a straight line.
- Attempt to maintain the plank position for 15 seconds while maintaining steady breathing. Then, gradually lower yourself back to the floor.
- If maintaining a straight back during an extended plank is challenging, it’s best to stick to standard planks.